People think I don’t have a life outside my site, but I do and when we plan a dinner, especially one as big as this, it takes time to prepare for the entire month-not just one night.
The Christmas cards and Christmas letter are done and ready to be mailed December 1. We have some of the outside lights up, but not turned on just yet. We have a few more to buy. It is a good idea to do this when the weather is decent and not in a snow storm.
The two lighted deer who move, are put now together and will be put outside just in front of the patio wall of windows so everyone inside can see them work. We bought two 3 ft. tall Christmas Trees with lights already on them and placed one on each side of the fireplace. The evening of the dinner, we will turn them on.
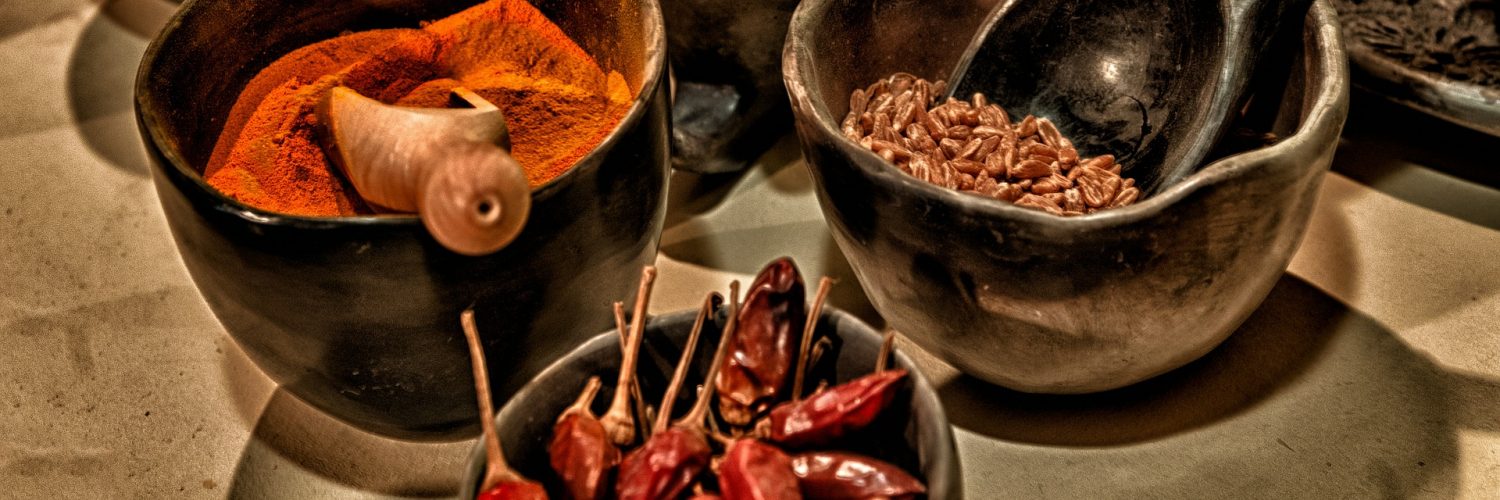
I spent a few days thinking about a ‘theme’ colour for the dinner settings and so far have settled on a (best way to describe it) is a winter greyish/bluish colour. Now that made sense, didn’t it? When the table is set, we will post a picture for you to see. I have made about 16-17 different items for the trays and have one more to go. I made my dessert and put it in the freezer.
We bought the clear wrap used for baskets and ribbon. I still have to type up what is on the tray so the recipients will know. Oh yes, I am going to type up menus for our guests to read and take home. They do….every year….
The candles, tablecloth and tablecloth cover are picked out and ready to go on the table . If this seems early, it gives me the opportunity to gather all what I need for the table and put it there for when I am ready to set the table.
The menu has been tweaked a few times to make sure it will all flow smoothly. We try hard but it isn’t always possible.
I am so lucky to have my talented furniture-maker husband. He is now making me a tall, thin table to house all the wine, glasses and snacks to enable people to pick their own and at their leisure. It also gives me time to spend with our guests. This is why we invite them over. Small plates and napkins will also be set out.
I know I am forgetting a few things, but as I have another week to work on it, I hope I can remember it all. Oh yeah! Can’t forget the Christmas Tree to be put up and decorated. I can do this! and I have for many, many years. It is a lot of fun once you have put one of these dinners under your belt. Honest…..

Silk Chocolate Cheesecake
I know I said earlier that I wanted to make a lemon dessert for our dinner, but ran across this one and it is such a proven winner, I changed my mind. I have talked about this one, but not posted the recipe…..until now.
Once you make this and try it, you will make it over and over again.
- 1 1/4 cup toasted, finely chopped pecans
- 2 tbsp. melted butter
- 2 tbsp. brown sugar
- 3/4 cup berry sugar
- 32 caramels, unwrapped – have fun! Melted
- 3 tbsp. cream
- 3 pkg. cream cheese
- 3 eggs
- 8 squares Baker’s dark chocolate, melted and cooled slightly
- 1/2 cup toasted pecan halves
- jar of Caramel sauce
Preheat oven to 350 degrees. Draw out a circle of parchment paper to cover a 9 inch spring form pan. Combine the pecans, melted butter, brown sugar and carefully spread over the bottom of the pan, on top of the parchment paper.
Peel the wrap off the caramels and with the cream, put in a bowl over a pot of simmering water to completely melt. Stir occasionally to make sure it is smooth. Pour this over the pecan mixture in the pan and cool completely.
Beat the softened room temperature cream cheese, berry sugar and eggs on low to completely blend and add to the melted chocolate. Pour over the cooled caramel layer. Wrap the pan with tin foil up to and including the sides of the pan and place in a larger pan filled 2/3 full with boiling water. Bake for 45-50 minutes. Run a knife around the edge to loosen and cool completely. Cover and place in the fridge overnight.
When ready to serve, drop a generous spoonful of caramel sauce on the plate and set a slice of the cheesecake on top, making sure it stands up. Drizzle in a zigzag pattern with some caramel sauce across the top and add a couple of pecans. If you don’t think this is enough, put a dollop of whipped cream on the side.
Note: The water bath will prevent the cheesecake from splitting and cracking. Just sayin’.
Also note…I have been baking for over 40 years and for the first time, I tried to take a shortcut and put the caramels in a microwave safe bowl and melt them. It almost set our house on fire. The smoke was horrible and, of course, it broke the bowl. Never again
Salmon with Ginger-Avocado Salsa
This is a nice healthy treat that will also do for a Ladies Luncheon…..
- 1/2 cup yogurt
- 1 stalk of celery, finely chopped, threads removed
- 1/4 cup pickled ginger, drained and chopped
- 1 ripe, firm avocado, diced
- 1 English cucumber, seeds removed and chopped (no big chunks)
- pinch of salt
- 4 salmon fillets
- 1 tsp. olive oil
Preheat oven to 500 degrees. Place rack in the upper third of the oven. Line a cookie sheet with tin foil. Mix all the ingredients except the salmon and oil together and set aside in the fridge to keep cold.
Brush the salmon with the oil and place skin side down on the cookie sheet. It should take abut 8 minutes to be cooked perfectly. To test, hold a fork in the thickest part of the fillet for about 10 seconds. If it comes out warm, it is done.
To plate….set a generous scoop of salsa on the plate and place the salmon fillet (minus the skin) on top. Serve with fresh warm buns and butter. Decorate with a small sprig of fresh dill.
Turkey and Mushroom Tasty Croustades
With the holidays around the corner and New Year’s Eve on the rise, this is a good way to use up some of the left-overs. Entertain with abandon and make these up ahead of time. You show off you!
- 20 slices of white sandwich bread (Cobbs Bakery is good)
- melted butter
Preheat oven to 350 degrees. Remove the crust and brush both sides of each bread slice with melted butter. Press the slices gently into muffins tins and bake until golden (approximately 15-18 minutes).
- 1/4 cup butter
- 1 cup finely chopped fresh button mushrooms
- 1/2 small onion, chopped fine
- 6 1/2 ounces chopped turkey
- 3 tbsp. flour
- 1 cup half and half cream
- 1 tsp. lemon juice
- pinch of salt
- pinch of Cayenne
- chopped fresh parsley
In a saucepan, melt the butter and saute the onionand mushrooms until the onion is transparent. Add the turkey meat and stir to combine. Sprinkle the flour over the mixture and blend well. Slowly add the cream and the rest of the ingredients (except the parsley, lemon juice, salt and cayenne) and bring to a boil and thickens. Remove from the heat and add the lemon juice, salt and cayenne. Fill the croustades and place on a cookie sheet and heat up in the oven, When hot, sprinkle parsley on top.
The empty shells can be made ahead and frozen. Do not fill.
**in a super pinch or you ate all the turkey, use (ugh) canned turkey flakes.
Overnight Coffee Cake
This is a good one to start when you have invited the girls over for coffee in the morning. It is done when you get up and all you have to do is bake it.
- 3/4 cup butter, room temperature
- 1 cup sugar
- 2 eggs
- 1 cup sour cream
- 2 cups flour
- 1 tsp. baking powder
- 1 tsp. baking soda
- pinch of salt
- 1 tsp. fresh ground nutmeg
Beat the butter and sugar until light and fluffy. Add the eggs beating well to combine and add the sour cream and, again, mix well.
Combine all the dry ingredients and gently combine. Pour into a 13 x 9 inch greased and floured baking pan.
Topping
- 3/4 cup brown sugar
- 1/2 cup chopped pecans
- 1 tsp. cinnamon
Combine the topping ingredients and sprinkle over the top of the cake. Cover with tin foil and set in the fridge overnight.
Remove from the fridge in the morning and let sit for 1 hour. Then bake in a 350 degreee oven for about 38-40 minutes.
Yummy!
Smoked Salmon Cheesecake
This makes a great luncheon entree or a superb appetizer for a dinner party. Depending on when you plan to serve this, it serves 10-12 guests.
- 1 1/2 tbsp. butter
- 1/2 cup panko crumbs, toasted
- 1/4 cup Gruyere cheese, shredded
- 1 tsp. finely chopped fresh dill
- 1/2 onion, finely chopped
- 3 tbsp. butter
- 28 oz. Philadelphia cream cheese
- 4 large eggs
- 1/2 cup whipping cream
- 3/4 cup Gruyere cheese, shredded
- 8 oz. smoked salmon, broken into flakes
- pinch of salt
Preheat oven to 325 degrees. Brush really well with butter, a 9 inch springform pan. Mix the first 4 ingredients together and dust the pan (bottom and sides) with the mixture, making sure to coat it well. Place in the refrigerator while you make the filling.
In a frypan, saute the finely chopped onion until it is transluscent and set aside. With a mixer, beat the cream cheese and eggs until fluffy. Beat in the whipping cream. Fold in the onion and salmon. Pour into prepared pan.
Wrap the bottom and sides of the pan with tin foil and go to the next step. Set the pan inside a roasting pan adding boiling water about halfway up the sides of the springform pan. Bake for 1 hour and 20 minutes until set. Leave the oven door open a little, cool the cheesecake for 1 hour. Transfer to a cooling rack, remove the tin foil and cool to room temperature before serving.
Place a lemon slice resting on the side of the pie with a sprinkle of finely chopped fresh dill. Two to three crackers on the plate will complete the dish.
My Favourite Impossible Pie
The first few years operating a B & B, I always added a little dessert (thought we needed the 5th course), and this was by far the most favoured.
- 4 eggs
- 2 cups milk
- 1 cup sugar
- 1/2 cup flour
- 1/4 cup melted butter
- 1 cup flaked coconut
- 1 tsp. pure vanilla
- 1/2 tsp. baking powder
- pinch of salt
- zest from one orange
Preheat oven to 350 degrees. Combine all the ingredients and beat until well mixed. Pour into a buttered pie plate (10″) and bake for 60 minutes.
When serving, drizzle with warm maple syrup.
The center will still be soft and when cooled the “crust” will be set and the custard filling is bloomin’ awsome.
I love this pie and found it almost addictive. So did everyone else. This was one pie that was never thrown out.
Lemon Mousse
In three weeks time, we will be hosting our “pre-Christmas dinner” with about 10 new friends. We have done this for years (if you are a follower of this site, you will know that). It will be their first. After searching everything I have, I decided on this. I think it will be a good one. Since it can be made 3 days ahead of the dinner, it is a good choice.
- 8-10 lemons
- 2 cups sugar
- 8 large egg yolks, plus 2 whole eggs
- 1 cup (2 sticks) unsalted butter, cut up
- 1 1/2 cups plus 2 tbsp. whipping cream
- chilled candied lemon zest *
- 1 eight ounce container of creme fraiche
In a large bowl, prepare an ice bath. Set aside. Juice 1 lemon and set aside. Juice enough lemons to make 1 cup of juice. Place the juice, sugar, egg yolks, whole eggs and butter in a saucepan. Cook over a medium heat for about 8 – 10 minutes until it begins to boil.
Strain this through a fine sieve into a bowl set on top of the ice bath. Stir occasionally until it cools down. Place plastic wrap over the entire surface and set in the fridge for about an hour.
Whip the cream until soft peaks form. Reserve 1/2 cup of the lemon curd to be used later and add the remaining curd to the whipped cream. Gently fold this together with a whisk until well combined.
Fill your ring molds (8-10) equally and place them on a cookie sheet to be placed in the freezer for up to 3 days.
Candied Lemon Zest*
This should be made one day before you make the mousse.
Scrub the skins of 4 lemons
2 cups sugar
1 cup cool water
Remove zest from the lemons with a vegetable peeler. Remove the white pith with a sharp knife and finely julienne. Place the zest in a small bowl and over with boiling water. Let stand for half an hour and then drain.
Bring the sugar and cool water to a boil , stirring until the sugar has dissolved. Add the lemon zest and cook for about 10 minutes. Remove from heat, cover and let stand overnight. Next morning store the zest in the syrup in an air tight container in the fridge until ready to use.
Drain the candied zest and reserve the syrup. Whisk 1/3 cup of the syrup, reserved 1/2 cup lemon curd and the juice of 1/2 lemon in a bowl.
Place the frozen mousse on pretty plates, letting stand for about 5-6 minutes to warm. Mix the creme fraiche wth the 2 remaining tbsp of whipping cream until soft peaks form. Remove the molds, spoon the lemon sauce around the base of the mousse, spoon some creme fraiche on top and add a spoon of candied zest on top.
Put a couple of your best shortbread cookies on the side and serve. (Your choice: whipped, lemon or pecan shortbread). What the heck, make it 1 of each.
Ginger Scones
These are a great tasting scone and our guests would ask if they could take any that were leftover for ‘later’.
- 2 cups flour, sifted
- 4 tsp. baking powder
- 1/4 cup sugar
- pinch of salt
- 1/2 cup COLD butter (never margarine)
- 1/3 cup finely chopped preserved ginger
- 2/3 cup milk
- 1 large egg white
- light brown sugar
Preheat oven to 450 degrees.
In a large bowl, sift together the flour, baking powder, sugar and salt. Cut in the butter until crumbly. Add the ginger and milk just until the dough comes together.
On a parchment lined cookie sheet, turn the dough out and pat together into a round. With a knife, score into 8 – 10 wedges. Brush with the whipped egg white and sprinkle with brown sugar.
Bake 12-15 minutes.
Have some butter, napkins and fresh brewed coffee on hand. See what I mean? They have all disappeared.
Marshmallows
True…it is a little off the wall or is it? What a way to showcase one of your homemade candies. This recipe only makes 24 pieces.
- 1 cup cold water, divided
- 3 1/4 oz. packets of unflavoured gelatin
- 2 cups sugar
- 2/3 cup white corn syrup
- pinch of salt
- 2 tsp. pure vanilla or almond flavouring
- 1/2 cup gluten free flour (very important)
- 1/2 cup icing sugar
Line a cookie sheet with tin foil and spray with Pam.
Pour 1/2 cup of the cold water in mixer with whisk attachment. Sprinkle the gelatin over the water and leave for 15 minutes to absorb the water.
Combine sugar, corn syrup salt and remaining water in a heavy saucepan, continually stirring until sugar dissolves. Wet a pastry brush and brush down the sides of the saucepan.
Attach a candy thermometer to the side of the saucepan and bring to a boil without stirring until the temperature reaches 240 degrees. This could take up to 8 minutes. With a mixer on low, slowly pour the hot liquid in a thin stream down the side of the bowl and increase speed to high and beat for approx. 15 minutes until very thick and stiff. Add flavouring and beat another 30 seconds. Scrape the mixture into prepared cookie sheet and with a wet off-set spatula, smooth the top. Let this stand for about 5 hours to completely set. I added green colouring to make it Christmas-like.
Now for the fun….mix the starch and gluten free flour together and sift out a generous retangle larger than the cookie sheet. Sift more of the mixture over the entire surface of the marshmallow. Now take a large knife and spray with Pam. Cut into 1 inch squares and totally immerse in the icing sugar mixture. Transfer to a rack to remove excess dusting. If you wish, you can toast some coconut and roll the marshmallow in it.
Damn I knew you could do this!
NOTE: I just made these and found that you need a large serving spoon, and keep putting it under the hot water tap to get wet (not to add liquid to the marshmallow) and spoon out into a well sprayed tin foil lined cookie sheet and keep spooning it into the pan. Then, take a long sheet of plastic wrap and put on top and flatten out the mixture evenly in the pan. Leave for 5-6 hours n ow to set. This makes it easier. The kids will love making this with you. Just be careful…it IS hot.
As you carefully pull the plastic wrap from the marshmallow, sprinkle some of the flour mixture on each bit as you go. Take it easy, it does come off, just slow moving.
Cheese Shortbread
 This is an extremely easy shortbread to make and absolutely delicious when served with drinks.
- 1/2 lb. Imperial Cheese (red plastic round container)
- 1/2 lb. butter
- 2 cups flour
- 2 tbsp brown sugar
Preheat oven to 250 degrees. Mix ingredients and knead about 4-5 times. Form into a log and place in the refrigerator for about one hour or until it becomes cold.
Slice thin and lay out on a parchment lined cookie sheet, Bake for one hour.Watch carefully to ensure it doesn’t burn. There is only one word to descrive these….yummy!
A glass of wine, snacks abound but THESE will be the star of the party (after you, of course.)
You really should make two recipes for this. I have to make one for my daughter and one for us. She loves them.
Duck Terrine
We have had a couple of requests for this recipe. Trust me, it takes a long time but you will never taste anything better. (Actually 3 days) Read through first.
Serves 10-12
Terrine:
- 1/3 cup milk
- 2 Moulard duck breasts (1 3/4 -2 lbs total)
- 4 tsp. kosher salt
- 1 tsp. ground black pepper
- 1 tsp. chopped fresh thyme
- 1/4 tsp. ground allspice
- 1/4 tsp. ground ginger
- 2 tbsp. Port (amber)
- 1 tbsp. brandy
- 1/2 cup whipping cream
- 1 large egg, lightly beaten
- 1/2 cup shelled pistachios
Freeze milk in a shallow dish, scraping once or twice with a fork to break up the crystals until completely frozen. This should take about 1 hour. Remove the skin and any fat with your fingers. When needed, use a knife.
Set a medium bowl inside a larger bowl filled with ice and water under the grinder to catch the meat, then feed only the meat through a second time, adding spoonfuls of the frozen milk as you go. Chill and cover with plastic wrap, in the fridge.
Using the same method, feed the duck skin with fat through twice then add to the duck meat and leave the bowl in the larger bowl of ice.
Add the remaining terrine ingredients and mix with your hands to combine well. Cover with plastic wrap and place in the fridge for at least 8 hours.
Glazed Shallots.
- 1 1/2 cup dry red wine
- 1/4 cup red wine vinegar
- 1/3 cup sugar
- 1/2 tsp. kosher salt
- 1 thyme sprig
- 1/2 bay leaf
- 1/2 lb. small shallots, peeled and trimmed
Bring the ingredients to a boil in a 1 quart saucepan stirring until the sugar is dissolved. Add the shallots (whole) and cover the surface with wax paper and simmer vigorously until tender (about 45 minutes). Transfer from the cooking liquid with a slotted spoon to a bowl and discard the sprig of thyme. Boil the liquid until it is about 1/3 cup. Pour over the shallots and cool.
Line and bake the terrine
Set the rack in oven to the middle and preheat oven to 325 degrees. Line the bottom and all sides of the terrine pan with proscuitto, overlapping the edges slightly and be sure to leave about 2 inch overhang on the long sides. Rub some of the duck mixture on the proscuitto to ensure the rest with stick to it and pack in two thirds of the remaining duck.
Make a trough down the middle with the back of a spoon. Gently push the drained shallots pointed end down in the trough. Pack the balance of the duck mixture on top and bring the overhang of proscuitto over the top (add more if you have to). Wrap in a double layer of tin foil. Rap the mold sharply on the counter to compact the mixture.
Bake the terrine in a water bath for about 2 hours. Remove the foil and cook on a rack for half an hour.
To weigh the terrine, place in a clean baking pan and place a piece of parchment paper on top. Place a piece of wood or cardboard the exact size of the terrine that has been wrapped in foil on top and add a couple tins of soup. Chill this now for about 4 hours. Continue to cool without the weights for at least 24 hours to allow the flavours to develop.
Serving
Run a knife around the edge of the terrine and let stand in about 1 inch of hot water to loosen the bottom for about 2 minutes. Tip the terrine, making sure you have a hand on the top, to drain excess liquid; reinvert on a cutting and with a paper towel gently wipe the excess liquid off the Proscuitto. Let stand for about 30 minutes then cut into 1/2 inch slices and serve on plates that have been drizzled with the wine syrup.
This will keep well if wrapped in plastic and kept chilled for about 1 week.
Oh yeah, read this through first and loudly proclaim “damn, I can do this!”